Import contacts
It is super easy to import your contacts to Wobaka, just follow these steps.
1. Export your contacts
Start in your current CRM system, spreadsheet or whatever you are using and export your contacts to a CSV file. If you already have a CSV file, go directly to step 2.
2. Import contacts to Wobaka
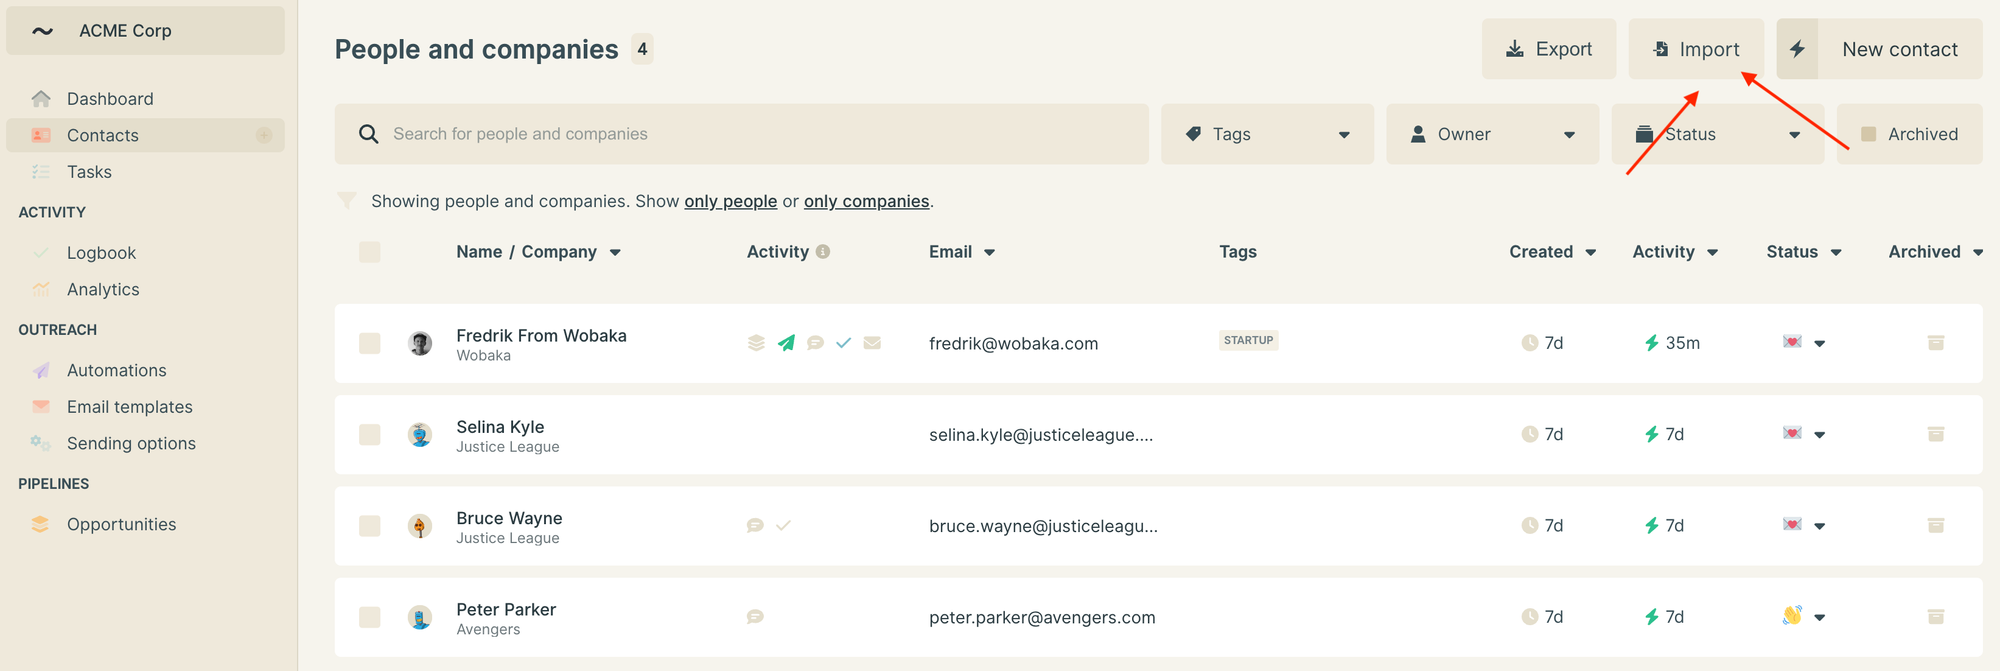
Start by going to the contacts page and clicking the import button.

3. Choose status for imported contacts
After you have selected a file you can select what status the imported contacts should have in Wobaka. You can customize your statuses in settings.


4. Assign fields
After selecting status you can assign what fields you want to import. Unassigned fields will not be imported to Wobaka. This video shows how to proceed with the import.
5. Custom fields (Optional)
Wobaka also has support for importing custom attributes on contacts. You can set your own attributes by assigning the column to Custom and typing the name of your attribute. Note that only English letters, numbers, hyphens and spaces are allowed as attribute names.

That's it! Your contacts are now imported 🥳!